TheConservatory
The Team
Here’s a list of all the lovely folks who helped with this project:
- Len (Phil’s dad) - planning, labouring, site foreman - you know the score :).
- Jim (Angela’s dad) - moral support, digging & tool hire (pick axe anyone?).
- Stuart - more labouring, moral support.
- Martin, Robert & Joseph - enthusiasm and construction.
- Angela - design, tea making & painting.
- Clem - yet more labouring, gophering..
A big thank you to everyone, if you feel I have forgotten you please email me and it shall be corrected!
The Theory
“We need more space!”
Ring any bells? Well with our size family we need all the space we can get, especially when the youngest leaves our room. Right now moving home is simply out of the question - a five bedroom property costs 3-4 times as much as our present 4-bed home did 5 years ago - madness! We had been thinking about a conservatory on and off for a couple of years and now it made sense as the cheapest way to get more space for the ‘stuff’ that accumulates around children (and Phil), freeing up bedroom space for beds! In addition, Angela wants to grow more exotic plants and fruits (bananas), Phil is keen to make the house more ’eco-friendly’, using solar energy from a conservatory for spring/autumn heating - so we went for it!
Start by digging a hole..
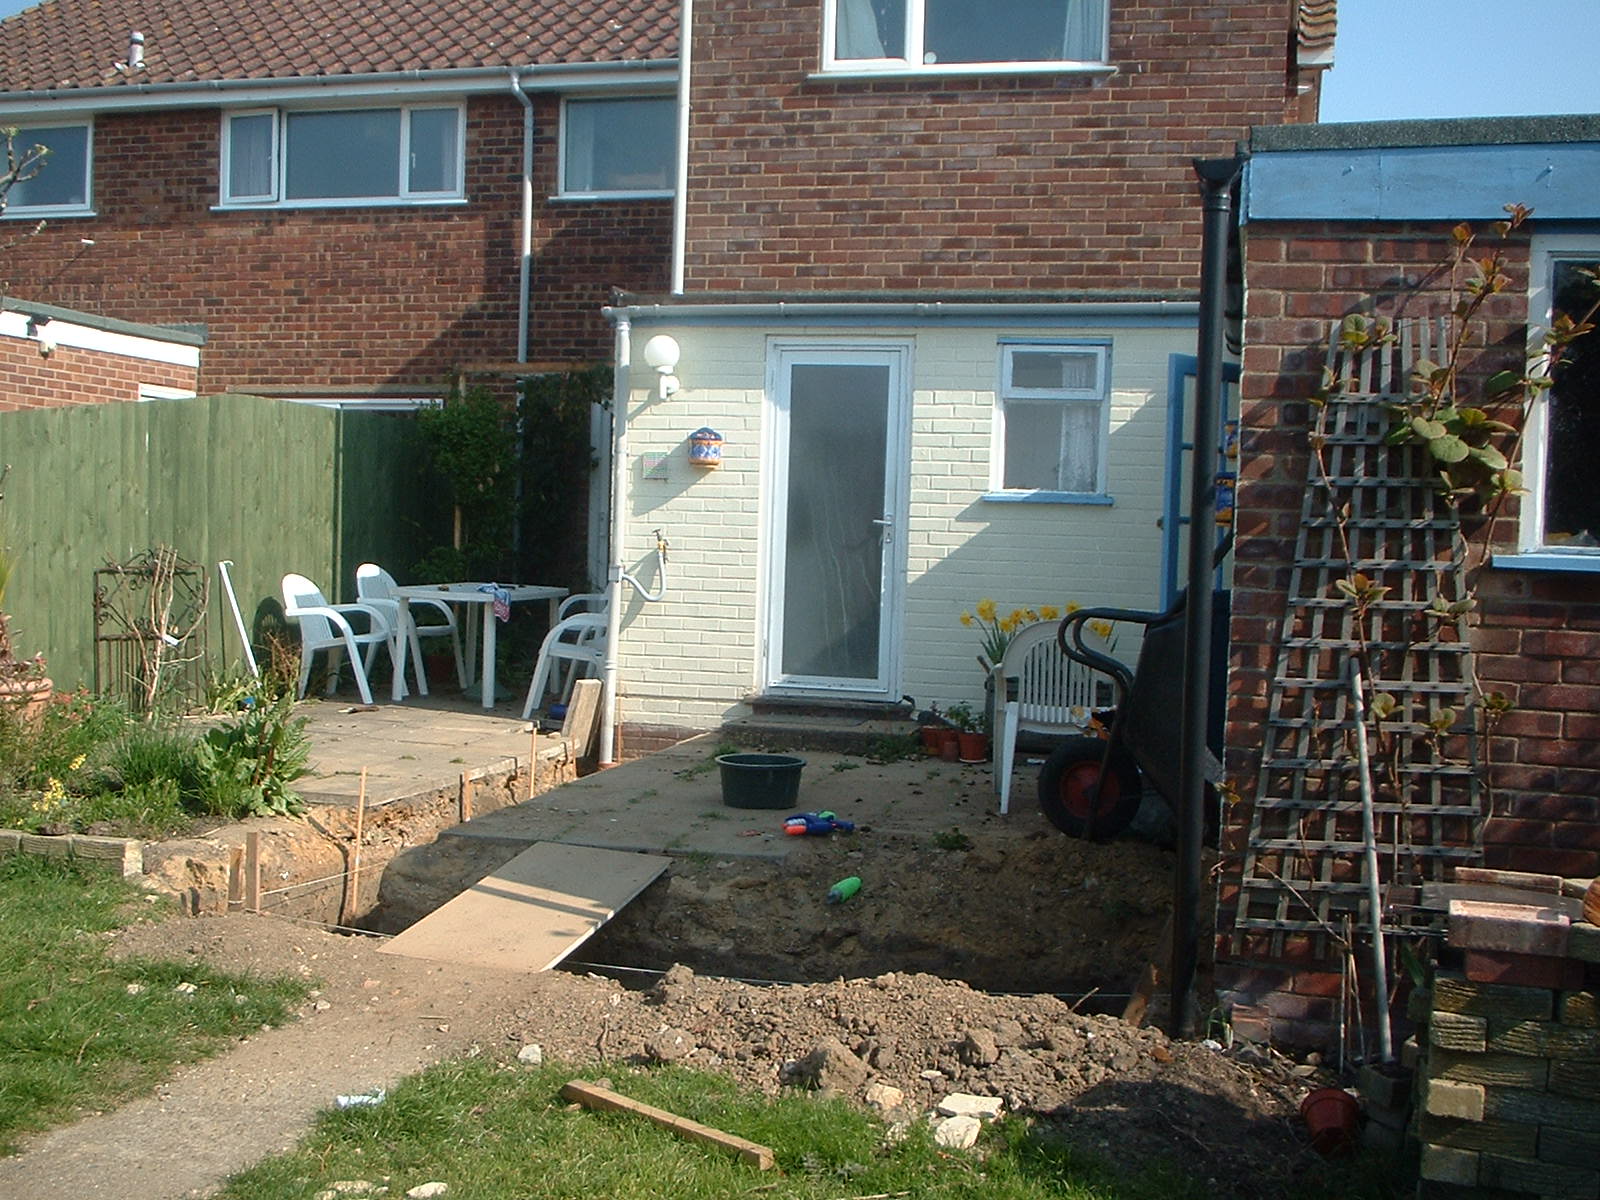
This photo was taken at the end of April, two weekends into the project, and two weeks before the kit of parts arrived from our chosen conservatory company Baltic Pine
Actually Phil should have started digging about a month before, because there was a lot of rubble in there that needed removing to the skip (two skips eventually..)
Now fill it in again..
Having dug a nice hole, fill it in with freshly mixed concrete. To a neatly marked out level - or failing that until you run out of ballast.. :)
Buy some more ballast, then some more cement. Then spend another weekend shovelling it into a mixer..
NB: Always hire a cement mixer - even for ‘just one’ bag of ballast..
Build a wall..
..or get a nice chap down the road to build one for you, after you’ve been to several builders merchants trying to find one that has the required type of bricks (a condition of the planning permission of course!)
Cheers Ron!
Relax :)
OK. So at this point we took a holiday - things stopped for a couple of weeks while we enjoyed the delights of Kent.
Paint some woodwork..
Time to unpack the kit of parts that arrived in mid-May, and see just how many bits there are (eek!). Then sort out those that will be going up first and set to work with the wood stain. Nice.
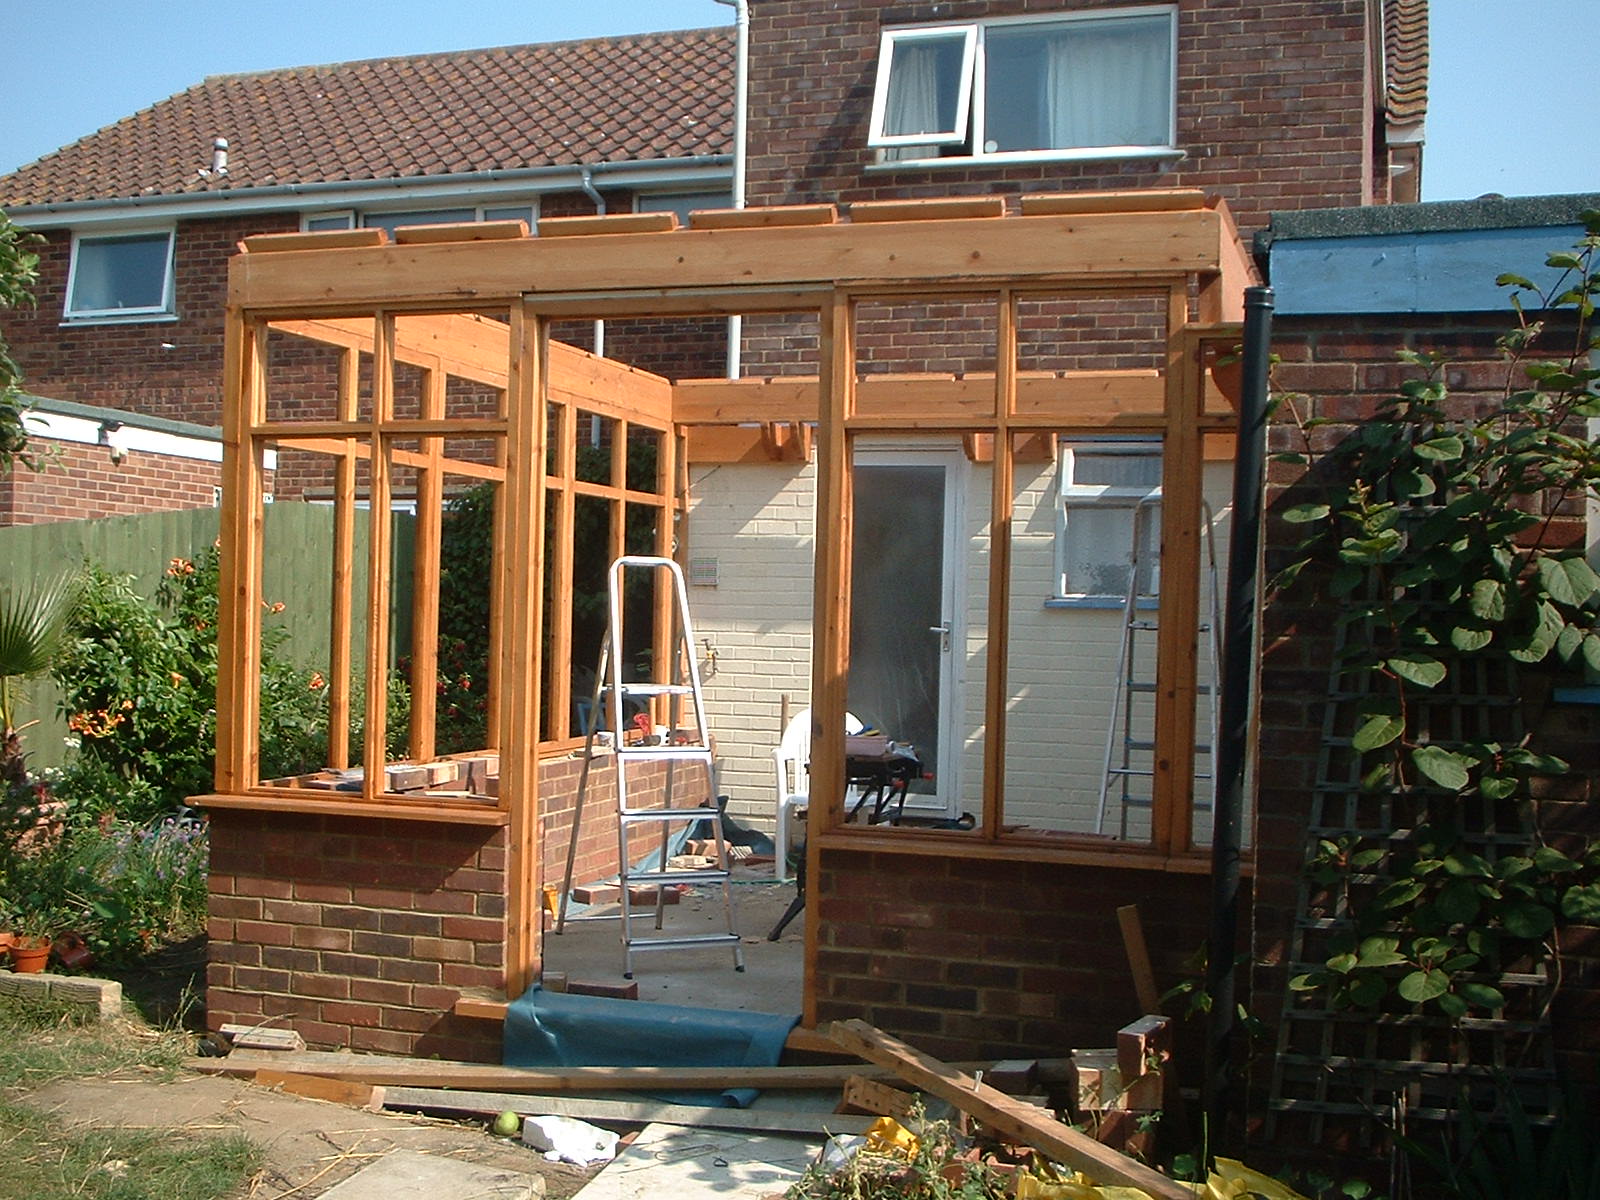
See if the frames fit..
A scary bit. Is the wall the right size? Is everything square? Where does this bit go? Have I sawn off the right end? Phew.
Build the floor
Yup - more concrete! Lovely. Only this time we’ve added a damp proof membrane, underfloor polystyrene insulation, steel reinforcing mesh and it’s all got to be done inside the walls, then levelled off with a batten. We chose to fix some guides to the walls first (a good idea - thanks Dad!).
It was tricky, we ran out of ballast yet again and it was hot, so the cement dried out very quickly - however hosepipes are great! We finished off with a plain cement screed (a thin layer on top of the concrete) to make everything smooth.
By this time the builders merchant / hire firm knew what I wanted as I walked in the door - actually they were getting a little worried about my project and asked if everything was ok, which was nice of them!
Get some help, then some more.
At this point lots of people are needed to stain the woodwork, drill the wall fittings, trim the end frames, apply the sealant, balance the frames, drill the pilot holes, put in the screws, read the manual (again!) until you get this:
Put up the roof
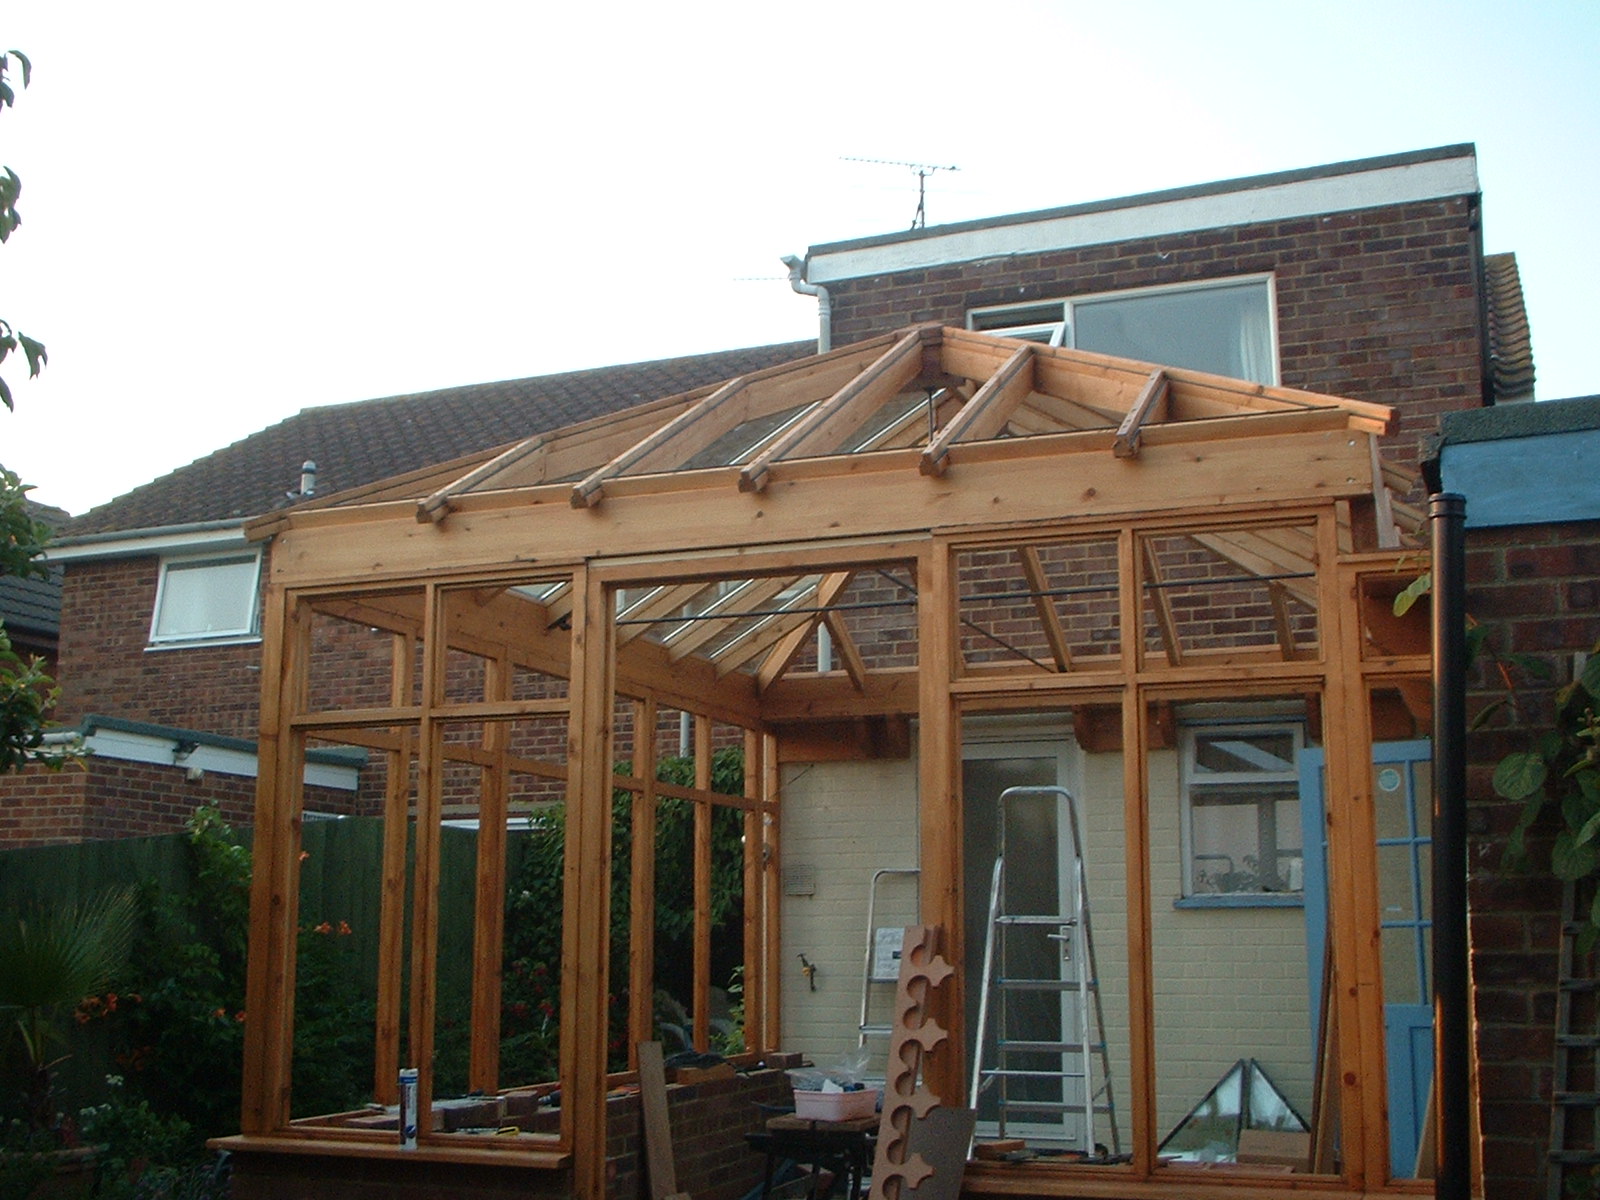
The most complicated bit of any wood conservatory is the roof - in our case a beautifully made pine frame (I am on commision if you buy one!) with double glazed panels, pre-built in the factory, and reassembled on site by yours truely, which must be put back together exactly right or the glass won’t fit - ulp!
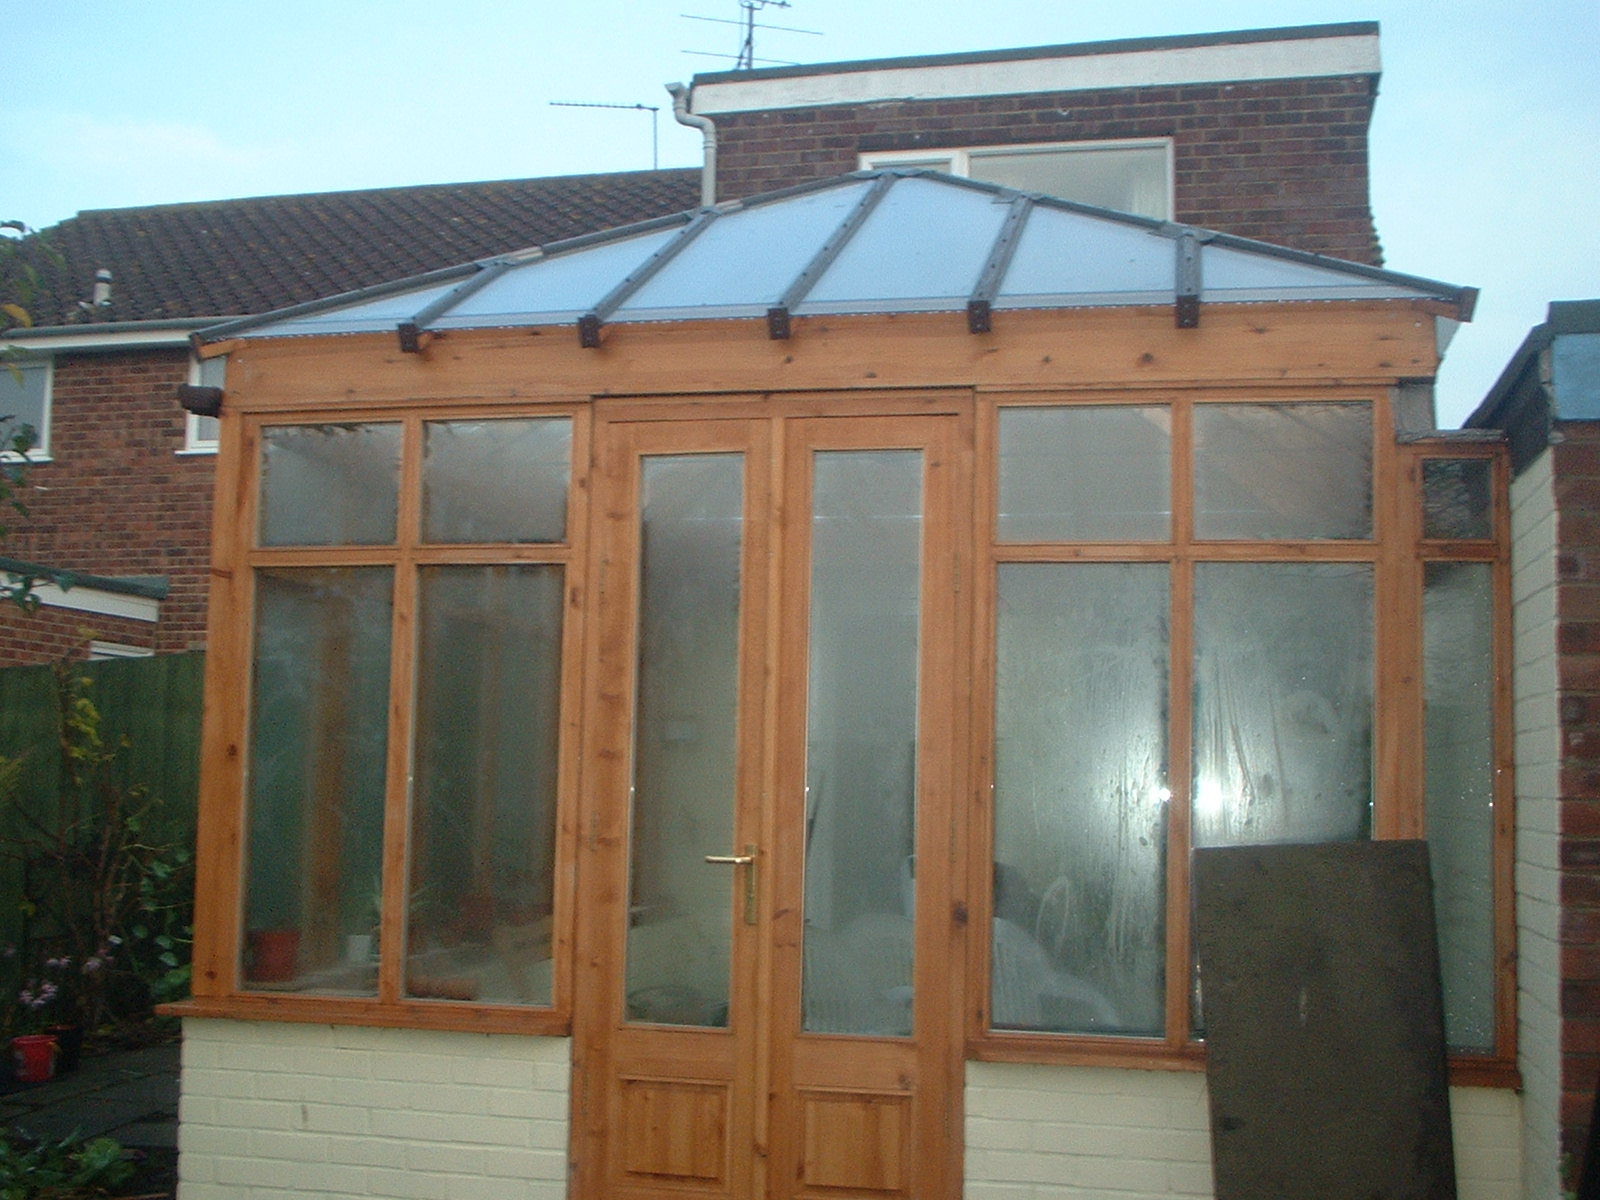
Glazing the roof
Today we put in some of the glass panels - and thankfully they fitted nicely!
Update: Unfortunately the aluminium opening roof window was the wrong size - bah. Spent 2 months chasing the supplier for the right size one.
The finished article!
It’s done (nearly)! All the windows are in, the doors are fitted, and the electrics are installed. Which of course means I can have lots of flashing Christmas lights strung up round the roof to show it off at night :) It does however need the dripping box gutters sorting out - serve me right for putting a join along the bottom of the lining :(
This picture was taken at 08:34 on Dec 3rd 2003 - chilly isn’t it?
Would I do it again?
Snow update! (2004)
I’m glad to report that after the recent snow falls here in Feb 2004, that my roof construction holds up, and the gutters didn’t leak after I sealed them with liquid rubber back in November. Angela has also been busy painting the walls, and filling it with plants - infact it almost looks habitable, now where did I put that floor tile catalogue….
..and finally.. a floor! (2005)

It’s nearly June 2005, so the structure has been up almost two years, and all that time I’ve been meaning to tile the floor. No really, I have. Honest.
Well I finally discovered a long weekend, at the start of half-term when we weren’t rushing off to do stuff as a family - so I laid the floor - yay!
PS: That slightly sticky up tile in the left foreground? It got fixed last week, and I grouted it all, with more help from Stuart - ta.